Sailing
You sail your ship as her captain would: you give orders to the helm, the sails and the yards, and the crew carries them out.
The helm
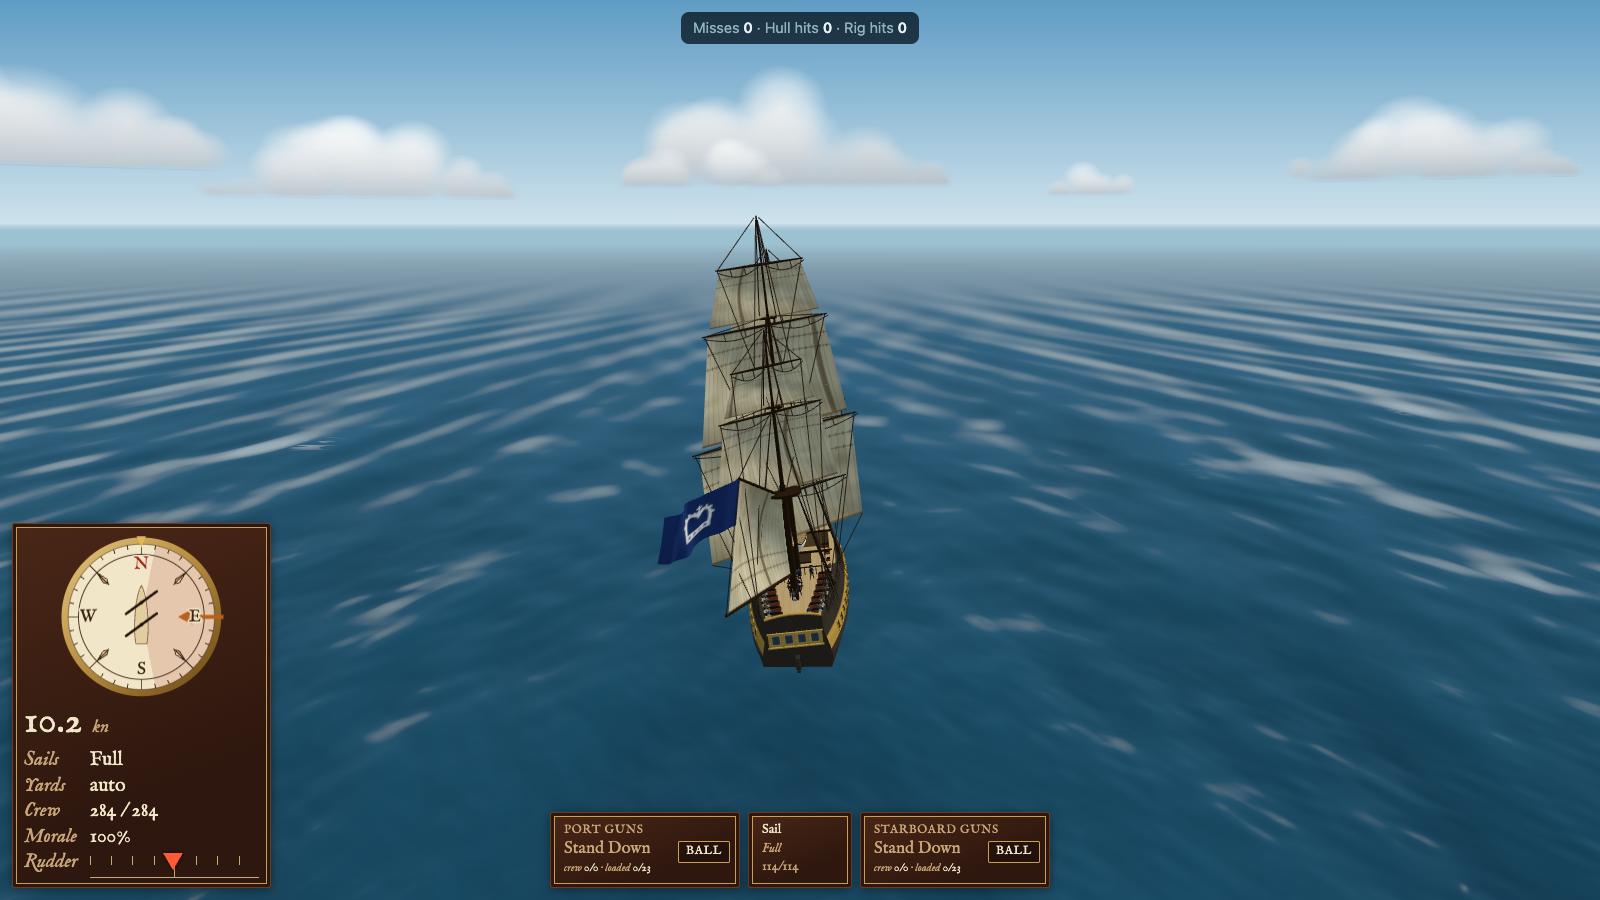
Hold A or D (or the left and right arrows) to put the helm over to port or starboard; let go and it eases back amidships. Double tap either to put it hard over and leave it there: touch the helm again to take it off. The rudder takes a moment to go over.
The rudder only works with water flowing past it. A ship with no way on can't be steered, and the faster she goes, the faster she turns. Going astern, the rudder works the other way.
Sail
W makes more sail and S takes it in, a step at a time: none, topsails, full (or the up and down arrows). Clicking or tapping Sail on the station bar steps round none, topsails, full. Each step is an order to the men aloft. They have to get up there first, and then the canvas comes in or out over a few seconds. Bigger ships are slower: a cutter's sails answer almost at once, a first-rate's take several seconds a step. With fewer men at the sails, it takes longer.
Yards and auto-trim
The yards are braced to the wind for you: that's auto-trim, and it's on from the start. You can brace them yourself, the fore yards with Q and E and the main and mizzen yards together with Z and C. Doing so turns auto-trim off; F turns it back on. The yards swing as fast as the men at the sails can haul them round, by hand or under auto-trim: man both broadsides and the sail station is left with a skeleton crew, so the yards come round at about half speed.
A yard group with the wind on the front of its sails is aback and pushes the ship astern. Each group also turns the ship, the fore yards pushing the bow and the after yards the stern. That's how a ship with no way on can be turned: brace the fore yards round and back them, and the bow pays off.
The cutter has sheets, not yards: R and T work her headsails, the staysail and jib together, as on a square rig; Z and C the mainsail.
The brigantine, in the shipyard's Sea Trial, has both: yards on her foremast, braced on Q and E as a brig's are, and a gaff mainsail sheeted on Z and C as the cutter's is. Her yards can't brace round as far as her gaff can be hauled in, so close-hauled the gaff does most of the work, and she points higher than a brig.
The wind
The compass rose turns with your ship. Its arrow shows where the wind comes from, and the shaded wedge either side of it is the no-go zone. At its pale outer edges, the shoulders, you are pinching: the sails still draw, but she slows the higher you point. In the darker middle the sails stop drawing. With auto-trim on, you never need the yards to sail close-hauled: steer, and auto-trim keeps them braced sharp.
Next to the speed, an arrow and a second figure show the speed the sails are driving her toward. A ship takes half a minute or more to gain or lose way, so when you steer up or change sail, the arrow tells you at once where she will settle. Brace her yards aback, toward the side the wind is on, and she stops quickly and goes astern; with the wind abaft the beam the sails can't be laid aback, so bring her up first. Bring a ship's head right into the wind and she stops, then gathers sternway; the speed shows it with a minus sign, as −1.5 kn.
Square-rigged ships can't sail very close to the wind, and they make leeway, a sideways drift away from it. Sailed full at the edge of the no-go zone, a square-rigger still gains ground to windward, slowly; footed off a little, she goes faster and gains less. Pinched a little into the shoulder she goes slower but gains more, and the bigger the ship the more pinching helps; pinch too far and she gains less again. Some ships point higher than others: the brig is the most weatherly square-rigger, then the frigate, the Seventy-four, and the First Rate least of all. The fore-and-aft cutter points much higher than any of them. A ship to windward of you can choose whether to fight; to take the weather gage from her, you have to out-point her.
Ships are fastest with the wind on the quarter, and a little slower dead before it.
Square-rigged ships also carry fore-and-aft sails. The headsails, out on the bowsprit, push her bow away from the wind; the staysails between the masts mostly add speed; the spanker, at the stern, pushes her stern away and so brings her head up. They go up and come down with your square sails, and with all of them set she sails straight. Auto-trim sheets them with the yards, and when you brace by hand they follow the yard keys: the headsails with the fore yards, the staysails and spanker with the main. Brace a group aback and its fore-and-aft sails back with it.
R and T sheet the headsails to port and starboard on their own. Sheet them to windward and they push her bow off the wind: from a standstill, with her yards edge-on to the wind, that pivots her round, and bracing the fore yards hard over aback with them is quicker still. Once you touch R or T the headsails stay where you put them until you press F.
Running aground
All round the island the sea shallows over a shelf, and its shoal runs a kilometre out from the northern point. On the map they're the dashed 5 m and 10 m lines, and on the minimap the pale water round the land. If her bow comes into water shallower than she draws, she stops dead and lies aground. Your compass panel says Aground, and so does her label in another ship's glass. Grounding does no damage, but nothing moves her ahead until you back her off: brace the yards aback and let the sternway carry her out into deep water. Bigger ships draw more, so they ground further from the shore; a cutter can cross the outer end of the shoal, but a frigate can't. NPC captains look ahead and keep off the shallows, and one that runs aground backs off the same way.